I’ve always loved the idea of Gelli mono printing, I love the look of the prints and love the idea of spreading your paint on the plate with a brayer and never quite knowing what you’re going to get at the end. I don’t like the idea of spending £60 (approx $90) on a decent sized Gelli plate. The one that I would want would be the 12″ x 14″ as I like to do my art journal pages about 8.5″ by 12″.
So, I was happy to find on the Interweb and YouTube a couple of videos showing you how you can make your own gelatine plate which is almost but not quite the same! I was very excited, however my excitement was very short lived as the first video, although entertaining, was by a lovely lady called Lindsey who goes by the name of The Frugal Crafter, spent quite a bit of time showing us exactly nothing in a very excited manner. Of course she used ingredients which I can’t get easily in the UK, such as Isopropyl Alcohol. We can’t just buy it off the shelf here in the UK. We have a substance called Surgical Spirit, which is almost the same but not quite. If you use Surgical Spirit, your plate will go white as the ethanol will emusify in water…and it’ll give you an almighty headache.
So, I thought I’d try the gelatine and glycerine receipe that Lindsey suggests….however in her excitement, she gives you the amounts, half a cup of this and a cup of that and 4 packets of gelatine….but fails to tell us what SIZE the ingredients make up! i.e how big the plate would be. I then found two other use(full/less) videos who pretty much do the same thing…this time adding sugar and the like. But none of them tell you what size plate the amounts are supposed to make up.
So, I gave up….watching and decide to try my own receipe using ingredients which can be bought easily in the UK.
I went out and bought 9 packets of gelatine and dissolved these in two pints of water. The 9 packets would normally set 9 pints of water according to the back of each packet. So I thought, 9 into 2…easy!
 No…9 does set in a short space of time, mine set in less than two hours, and I didn’t even put it in the fridge. However, the gelatine slab that I created in an 8.5″ x 12″ tub, was not very stable and ripped and fell to pieces almost as soon as I’d extracted it from the mould. I tried twice!
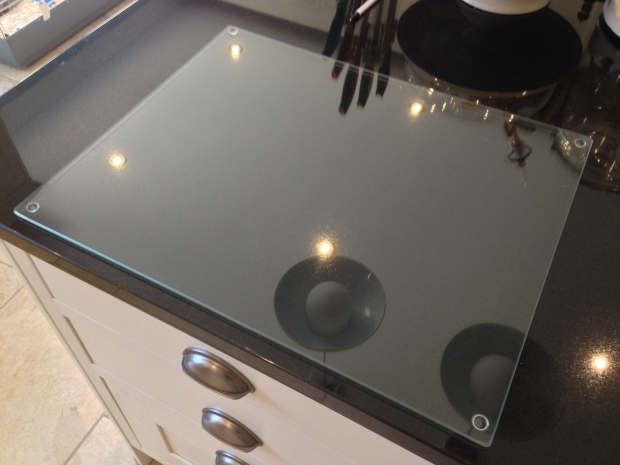
Then the logic circuit in my brain clicked into place. WHY was I trying to create a non permanent gelatinous slab for print making when I already have three 18″ x 24″ smooth surfaced plates in my kitchen? I’ve had them for ages. They’re called worktop savers and are made of tempered glass. I use them to protect my granite worktops when I’m chopping and rolling and putting down hot pans straight from the hob…
So out came the acrylic paints and brayer and with a little water spritzer bottle…lo and behold…..


Six fabby 8.5″ x 12″ looking prints in less than 10 mins…and I haven’t even reached for my stencils yet!
Who’d have thought it. A worktop saver that cost less than £5($8), pretty much does the same job! So watch this space art journal peeps and I’ll share some more prints when I have more chance to experiment and play in my kitchen! If you’d like a closer look at the prints, just click on the image and a bigger version will “pop up”.
Hope you’ve had a great weekend.
Mike

a piece of speedycut carving block would do the same thing and its thicker and easier to work with. its what we used in print making class
LikeLiked by 1 person
Great idea, thanks for that one!
LikeLiked by 1 person
I do the same with a sheet of plexiglass. Works like a charm ;)) Great prints!
LikeLiked by 1 person
Thanks Patricia…I’m experimenting with silicone mats next!
LikeLiked by 1 person
Oooh, I’ve heard great things about those ;)) Looking forward to what you discover (and share I hope!)
LikeLiked by 1 person
Brilliant solution! I take part in Art to the 5th Academy’s “Documented Life Project”….creating an art journal/kind of planner using monthly themes, weekly art challenges and journal prompts from the ladies at Art to the 5th. I’ve grown so much as an artist since the first of the year and enjoy the challenges. However, this week the challenge is to use a gelli plate….but I don’t have one. So here it is Wednesday and the challenge came out last Saturday. But, now, with your wonderful post I now have a way to create the pages because I have the same kind of “cutting board” as we call it here in the US. I’m so excited! Thank you so much for sharing your experience and for liking a post on my blog so that I found you. I look forward to seeing more of your art when I have time to really look through your blog (which I’ll now be following). Happy creating and Peace to your heart, Sara
LikeLiked by 1 person
Thank you so much Sara, glad I could help and it will be great to have you on board my creative journey. Best wishes. Mike
LikeLiked by 1 person